使用 trueSpace 製作插畫As an illustrator, you may think that working in 3D would be difficult or more time consuming than working in 2D, but it can be much quicker and more flexible to include 3D in your workflow! Illustrator Paul Woodward gives an insight into some of the many benefits of 3D by looking at how easy it is to get the look you (or your client!) wants for an image. We have kept the style of image simple for this introduction, so you can focus on how easy the workflow is - the same concepts apply no matter what your style of illustration!
|
Setting The Scene |
|
|
|
On the left is our basic empty scene.
|
|
|
 We
can bring in our props. These can be objects we make ourselves,
ones we have made before and stored in a library, or even
pre-made content from free or purchased libraries. We
can bring in our props. These can be objects we make ourselves,
ones we have made before and stored in a library, or even
pre-made content from free or purchased libraries.
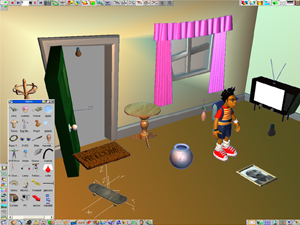
With simple click-and-drag operations, we can reposition and even resize our objects until we have our set laid out the way we want.
|
|
|
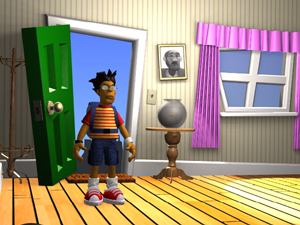 Then
we can position our objects to start composing our image. You can
see the objects as solid even while you work with them, and once you
have something you want to test, you can click on Render Scene to
see how the image would look. Then
we can position our objects to start composing our image. You can
see the objects as solid even while you work with them, and once you
have something you want to test, you can click on Render Scene to
see how the image would look.
So far, we have no shadows and we are using simple materials. We will add more details later.
|
|
|
Quick changes |
|
|
|
This only takes one click-and-drag of the mouse on our navigation widget, then a click on the Render Scene button and we have our new illustration.
|
|
|
|
No need to worry about drawing realistic glass and water, trueSpace Illustrator will take care of it - you just pick that you want it made of glass, and let the software do the rest!
|
|
|
|
You can produce a final image this way, or just a draft sketch to guide your 2D work by showing you how the light and shadow would fall in a scene.
|
|
|
Changing the mood |
|
|
|
To the left you can see the stages as the image changes from one version to another, with simple clicks to replace objects, replace textures, adjust lighting, and then render out the new image.
|
|
|
|
In this image, we can see the light and shadows passing through the atmosphere in the room. All I had to do for this was set a few options in trueSpace Illustrator, and this effect was added to the image!
|
|
|
The finishing touches |
|
|
|
Using a 2D package we can layer different images and text, and we can the same in trueSpace Illustrator, e.g. we can use trueSpace Illustrator to produce true 3D text. The separate elements can be combined in 3D or in 2D, whichever is fastest and most convenient.
|
|
|
|
This is only a quick overview of the process, and these steps get covered in more detail in the on-line web slideshow.
|
|
|
| Remember, this scene is only one particular look - be sure to view the Samples page to get a feel for the range of work illustrators have been producing with trueSpace! |
| 頁首 |
 One
way to visualize working in 3D is to imagine that you are
building a set for a film - you lay out the props, place
the lighting, and position the camera.
One
way to visualize working in 3D is to imagine that you are
building a set for a film - you lay out the props, place
the lighting, and position the camera.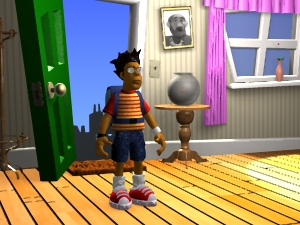 Since
we are using 3D objects, they don't just exist from the
side that we drew them, and by simply moving the camera,
we can change the composition.
Since
we are using 3D objects, they don't just exist from the
side that we drew them, and by simply moving the camera,
we can change the composition.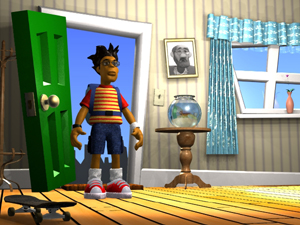 Once we
have composed the shot we can start to make the image look more
interesting.
Once we
have composed the shot we can start to make the image look more
interesting.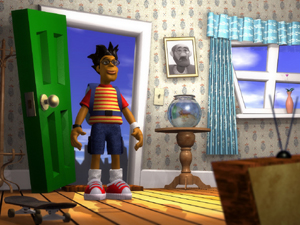 Shadows
can be very difficult to draw by hand but are easy in trueSpace
Illustrator - just place a light, adjust its options, and let
the software do the hard work.
Shadows
can be very difficult to draw by hand but are easy in trueSpace
Illustrator - just place a light, adjust its options, and let
the software do the hard work. With a
few adjustment to the lights and textures we can change the
mood of the scene completely. Here we have the scene set at
night with a light from the streetlight outside
casting a shadow through the doorway.
With a
few adjustment to the lights and textures we can change the
mood of the scene completely. Here we have the scene set at
night with a light from the streetlight outside
casting a shadow through the doorway.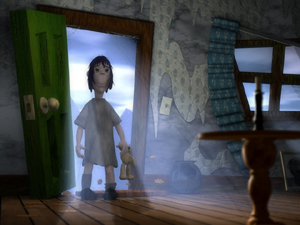 It
is not just about making changes quickly and easily,
but also about making it possible to achieve effects
that would be very difficult in 2D.
It
is not just about making changes quickly and easily,
but also about making it possible to achieve effects
that would be very difficult in 2D.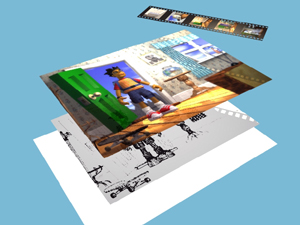 When we
have an image we are happy with we can use trueSpace Illustrator
to create more elements for our final illustration.
When we
have an image we are happy with we can use trueSpace Illustrator
to create more elements for our final illustration.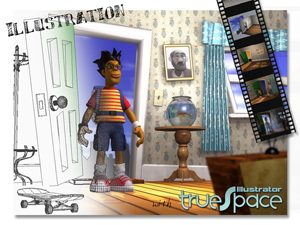 Here
is our final image. 2D and 3D compliment each other
perfectly, and no illustrator should be without each
in their toolset!
Here
is our final image. 2D and 3D compliment each other
perfectly, and no illustrator should be without each
in their toolset!